In this guide, we will provide you with easy-to-follow steps on how to effectively clean your dog's ears, ensuring their health and happiness.
Key Takeaways:
- Regularly cleaning your dog's ears is important for maintaining their overall health and preventing infections.
- Before cleaning, make sure to gather all necessary supplies such as ear cleanser, cotton balls, and treats to reward your dog.
- Gently lift your dog's ear flap and inspect the ear for any signs of redness, discharge, or foul odor before starting the cleaning process.
- When cleaning, avoid using Q-tips or inserting anything deep into the ear canal as it can cause damage. Instead, use a gentle cleanser and cotton ball to wipe away dirt and debris from the visible parts of the ear.
- If you notice any abnormalities during the cleaning process or if your dog shows signs of discomfort, it's best to consult with a veterinarian for further examination and guidance.
Why is it important to clean your dog's ears regularly?
Regularly cleaning your dog's ears is essential for their overall health and well-being. Just like humans, dogs can develop wax buildup, dirt, and debris in their ears, which can lead to discomfort and even infections. Cleaning their ears helps prevent these issues and promotes good ear hygiene.
When you clean your dog's ears, you remove excess wax and debris that may be blocking their ear canal. This allows air to circulate properly and prevents moisture from accumulating, which can create a breeding ground for bacteria or yeast. By keeping your dog's ears clean, you reduce the risk of painful ear infections and other related problems.
Cleaning your dog's ears also gives you a chance to inspect them for any signs of infection or injury. You may notice redness, swelling, discharge, or an unpleasant odor, indicating a potential problem that requires veterinary attention. Regular cleaning enables you to catch such issues early on and seek appropriate treatment promptly.
Signs that indicate your dog's ears need cleaning
As a responsible pet owner, it's crucial to be aware of signs that indicate your dog's ears need cleaning. Some common indications include:
- Frequent scratching or rubbing of the ears
- Tilting or shaking of the head
- Inflammation or redness in the ear canal
- Persistent odor coming from the ears
- Excessive wax buildup
- Discharge or pus-like substance in the ear
If you notice any of these signs in your dog, it's time to clean their ears. However, it's important to remember that some dogs are more prone to ear problems than others, such as those with long, floppy ears or breeds with hair that grows inside the ear canal. These dogs may require more frequent ear cleaning to prevent issues.
Supplies needed to clean your dog's ears properly
Before you start cleaning your dog's ears, it's essential to gather the necessary supplies. Here are the items you'll need:
- Ear cleaning solution: Use a veterinarian-recommended ear cleaning solution specifically designed for dogs. Avoid using alcohol-based solutions or any product not meant for canine use, as they can irritate the skin.
- Cotton balls or pads: These are used to apply the ear cleaning solution and gently wipe away dirt and debris from the outer part of your dog's ears.
- Tweezers or hemostats (optional): If there is visible debris deep in your dog's ear canal, you may need tweezers or hemostats to carefully remove it. However, it's crucial to be extremely gentle and avoid inserting anything deep into the ear canal.
- Treats: Having some tasty treats on hand can help make the experience more positive for your dog and reward them for their cooperation during the process.
Gathering these supplies beforehand ensures that you have everything ready and easily accessible when it's time to clean your dog's ears.
Preparing your dog before starting the ear cleaning process
Gathering the necessary supplies
Before you begin cleaning your dog's ears, it is important to gather all the necessary supplies. This includes an ear cleaning solution specifically formulated for dogs, cotton balls or pads, and treats to reward your dog for their cooperation. Having everything ready beforehand will help make the process smoother and more efficient.
Creating a calm environment
To ensure a successful ear cleaning session, it is essential to create a calm and comfortable environment for your dog. Find a quiet area where you can easily access your dog's ears without distractions. It may be helpful to have another person present to assist in restraining your dog if needed.
Tips for calming anxious dogs
- Play soothing music or use white noise to drown out any loud noises that may startle your dog.
- Use calming pheromone sprays or diffusers in the room.
- Provide your dog with their favorite blanket or toy to help them feel secure.
Using regular soap or shampoo to clean your dog's ears: Is it safe?
Using regular soap or shampoo to clean your dog's ears is not recommended. These products are not formulated for use on delicate ear tissues and can cause irritation or allergic reactions. It is best to use a specially formulated ear cleaning solution that is gentle and safe for dogs.
The dangers of using improper products
Regular soaps and shampoos often contain harsh chemicals and fragrances that can disrupt the natural balance of bacteria in your dog's ears. This imbalance can lead to infections, inflammation, and discomfort for your furry friend. Always opt for products specifically designed for canine ear care.
Safe alternatives
There are various veterinary-approved ear cleaning solutions available that are gentle yet effective in removing dirt and debris from your dog's ears. Look for products that are alcohol-free, pH-balanced, and contain soothing ingredients such as aloe vera or chamomile.
The correct way to apply ear cleaning solution to your dog's ears
Proper positioning
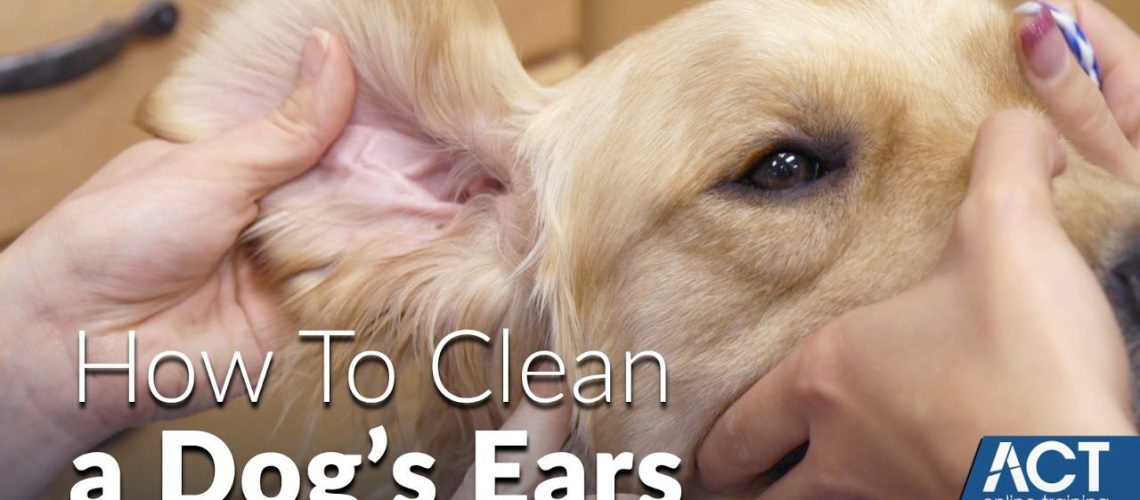
To apply the ear cleaning solution correctly, gently lift your dog's ear flap and hold it upright. This will help straighten the ear canal for easier access. Be careful not to insert anything deep into the ear canal, as this can cause injury.
Applying the solution
Using a dropper or the provided applicator tip, carefully squeeze a few drops of the ear cleaning solution into your dog's ear canal. Avoid overfilling the ear, as this can lead to discomfort or leakage. Massage the base of your dog's ear for about 30 seconds to help distribute the solution.
Tips for making it more comfortable
- Warm up the ear cleaning solution by placing the bottle in warm water for a few minutes before application.
- Talk to your dog in a soothing voice throughout the process to keep them calm and reassured.
- Reward your dog with treats and praise after each successful application to create positive associations with ear cleaning.
Gently and safely removing dirt and debris from your dog's ears
Using cotton balls or pads
Take a fresh cotton ball or pad and gently wipe away any visible dirt or debris from the outer part of your dog's ears. Avoid pushing too far into the ear canal, as this can cause damage. Use a new cotton ball for each swipe to prevent spreading any potential infection.
Dealing with excessive wax buildup
If you notice excessive wax buildup in your dog's ears, it is best to consult with a veterinarian before attempting to remove it yourself. They can provide guidance on safe methods or recommend a professional cleaning if necessary.
Signs of excessive wax buildup
- Foul odor coming from the ears
- Frequent head shaking or scratching at the ears
- Redness, swelling, or discharge
Cleaning a dog with sensitive or infected ears: Precautions to take
Consulting with a veterinarian
If your dog has sensitive or infected ears, it is crucial to consult with a veterinarian before attempting any cleaning. They can properly diagnose the issue and provide appropriate treatment recommendations. Cleaning infected ears without professional guidance can worsen the condition and cause further discomfort for your dog.
Using prescribed ear cleaning solutions
In cases of ear infections or sensitivity, your veterinarian may prescribe specific ear cleaning solutions tailored to your dog's needs. Follow their instructions carefully and use only the recommended products. These specialized solutions often contain ingredients that help combat infection and soothe inflammation.
Additional precautions for infected ears
- Wear disposable gloves while handling your dog's ears to prevent cross-contamination.
- Avoid touching other areas of your dog's body after handling infected ears without thoroughly washing your hands.
- Keep your dog away from other pets to prevent spreading any potential infection.
How often should you clean your dog's ears? Additional steps for long-eared breeds
Determining the frequency of ear cleaning
The frequency of ear cleaning depends on various factors such as breed, activity level, and individual ear characteristics. In general, most dogs benefit from monthly ear cleanings. However, certain breeds with long, floppy ears may require more frequent cleanings due to increased moisture and debris accumulation.
Tips for long-eared breeds
- Regularly inspect your dog's ears for signs of redness, swelling, or excessive wax buildup.
- Use a drying agent specifically designed for dogs with long ears to help prevent moisture-related issues.
- Consider using ear powder before cleaning to enhance grip and facilitate easier removal of dirt and debris.
Common long-eared breeds
- Basset Hound
- Cocker Spaniel
- Cavalier King Charles Spaniel
- Bloodhound
- English Setter
| Clean Your Dog's Ears with Care | |
| Regular ear cleaning is essential for your dog's health and well-being. By following these simple steps and using the right products, you can keep your furry friend's ears clean and free from infections. Remember to be gentle, patient, and reward your dog for their cooperation. If you have any concerns or notice any unusual symptoms, consult with a veterinarian. Keep those ears squeaky clean! | |
| Happy Cleaning! | |
What can I use to clean my dog's ears at home?
Buy an Ear Cleanser that is specifically made for ears that are not infected. This product helps to clean and eliminate any debris from the ear canal. It is recommended to use it 1-3 times a week, using a cotton ball or gauze to gently wipe away any excess wax or visible debris.
What is the brown stuff in my dog's ears?
Typical dog ear wax can vary in color from pale yellow to light brown. It's important to note that if there is dirt present, the wax may appear darker. The texture of the wax should be somewhat soft. It is recommended to regularly examine your dog's ears to determine what is normal for them, as some dogs naturally produce more wax than others. It is ideal to do this once a week.
Can I use hydrogen peroxide to clean my dog's ears?
It is not recommended to use hydrogen peroxide on your dog's ears because it can cause irritation to healthy skin cells. The ears contain delicate tissue, and prolonged use of hydrogen peroxide can potentially harm the ear. It is best to use ear cleaners specially formulated for veterinary use.
Can I use baby wipes to clean my dog's ears?
It is not advised to use baby wipes on dogs or any other pets. This is because the pH level of human skin is different from that of dogs, so baby wipes can be unsafe and may lead to irritation or itching.
Can I use soapy water to clean my dog's ears?
It is important to use a cleaning solution for cleaning dog ears that is approved by a veterinarian, rather than using hydrogen peroxide or soap. Certain cleaners have properties that can help prevent ear infections by killing bacteria or fungi. It is recommended to consult with a vet to determine the appropriate cleaner for your dog before starting the cleaning process.
How do you tell if your dog has ear mites or just dirty ears?
Ear mites are very small and can be hard to see, but you may be able to spot them if you wipe your dog's ears with a soft cloth and look for tiny white dots in the residue. Some signs of ear mites include brown or black waxy secretions and a strong smell coming from the ears.


